HTMl Table Or Form And Form Element
Day 5 : 60 Days Of Full Stack Web Development Challenge
HTML Table:
HTML tables offer a powerful tool for presenting data on your website
HTML table is used to display data in tabular form (row * column).
Defining Tables in HTML:
HTML Table Tag:
| Tag | Description |
| <table> | It defines a table. |
| <tr> | It defines a row in a table. |
| <th> | It defines a header cell in a table. |
| <td> | It defines a cell in a table. |
| <caption> | It defines the table caption. |
| <colgroup> | It specifies a group of one or more columns in a table for formatting. |
| <col> | It is used with <colgroup> element to specify column properties for each column. |
| <tbody> | It is used to group the body content in a table. |
| <thead> | It is used to group the header content in a table. |
| <tfooter> | It is used to group the footer content in a table. |
We can create a table to display data in tabular form, using <table> element, with the help of <tr> , <td>, and <th> elements.
Table row is defined by <tr> tag.
Table header is defined by <th> tag.
Table data is defined by <td> tags.
Example:
<!DOCTYPE>
<html>
<body>
<table>
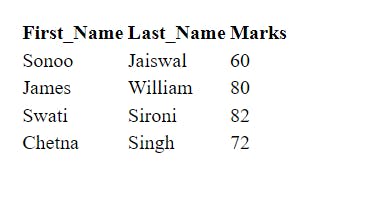
<tr><th>First_Name</th><th>Last_Name</th><th>Marks</th></tr>
<tr><td>Sonoo</td><td>Jaiswal</td><td>60</td></tr>
<tr><td>James</td><td>William</td><td>80</td></tr>
<tr><td>Swati</td><td>Sironi</td><td>82</td></tr>
<tr><td>Chetna</td><td>Singh</td><td>72</td></tr>
</table>
</body>
</html>
Output:
What are table rowspan and colspan in HTML?
The rowspan and colspan are the attributes of <td> tag.
These are used to specify the number of rows or columns a cell should merge.
The rowspan attribute is for merging rows of the table in HTML.
The colspan attribute is for merging columns of the table in HTML.
Syntax :
Following is the syntax to merge table cells in HTML −
<td rowspan="2">cell data</td>
<td colspan="2">cell data</td>
Example 1 − Setting the rowspan
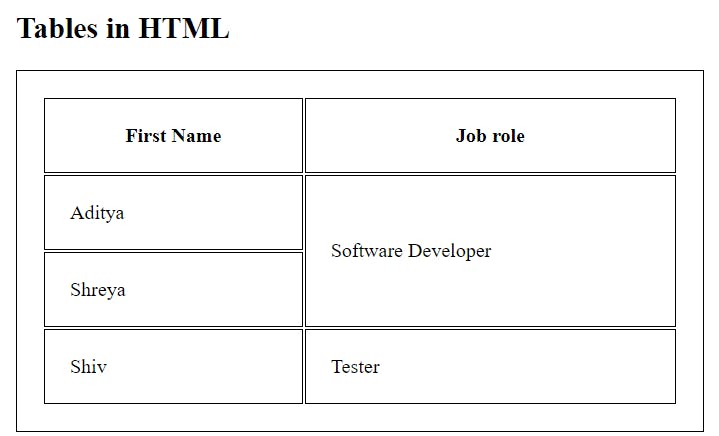
Now let us look at an example where we set the rowspan of the one of the columns to 2.
<!DOCTYPE html>
<html>
<head>
   <meta charset="UTF-8">
   <meta http-equiv="X-UA-Compatible" content="IE=edge">
   <meta name="viewport" content="width=device-width, initial-scale=1.0">
   <style>
      table,
      tr,
      th,
      td {
         border: 1px solid black;
         padding: 20px;
      }
   </style>
</head>
<body>
   <h2>Tables in HTML</h2>
   <table style="width: 100%">
      <tr>
         <th>First Name </th>
         <th>Job role</th>
      </tr>
      <tr>
         <td>Aditya</td>
         <td rowspan="2"> Software Developer</td>
      </tr>
      <tr>
         <td>Shreya</td>
      </tr>
      <tr>
         <td>Shiv</td>
         <td>Tester</td>
      </tr>
   </table>
</body>
</html>
Output:
HTML Form :
An HTML form is a section of a document which contains controls such as text fields, password fields, checkboxes, radio buttons, submit button, menus etc.
An HTML form facilitates the user to enter data that is to be sent to the server for processing such as name, email address, password, phone number, etc.
HTML forms are required if you want to collect some data from of the site visitor.
For example: If a user want to purchase some items on internet, he/she must fill the form such as shipping address and credit/debit card details so that item can be sent to the given address.
HTML Form Syntax :
<form action="server url" method="get|post">
  //input controls e.g. textfield, textarea, radiobutton, button
</form>
Features Of Form
Facilitates user input collection through various elements.
Utilizes <form> tags to structure input elements.
Defines actions for data submission upon form completion.
Supports client-side validation for enhanced user experience.
HTML Form Tags :
| Tag | Description |
| <form> | It defines an HTML form to enter inputs by the used side. |
| <input> | It defines an input control. |
| <textarea> | It defines a multi-line input control. |
| <label> | It defines a label for an input element. |
| <fieldset> | It groups the related element in a form. |
| <legend> | It defines a caption for a <fieldset> element. |
| <select> | It defines a drop-down list. |
| <optgroup> | It defines a group of related options in a drop-down list. |
| <option> | It defines an option in a drop-down list. |
| <button> | It defines a clickable button. |
HTML <input> tag :
The HTML <input> tag defines the field where the user can enter data.
For example :
<input type="text" name="firstname">
Browser Output :

type - determines the type of input the
<input>tag takesname - specifies the name of the input
To learn more about the HTML input tag and its types, visit HTML _Tag.
HTML <label> tag :
The HTML label tag is used to create a caption for a form element. The text inside the <label> tag is shown to the user.
HTML Label is mainly used for accessibility as screen-readers read out the label associated with the field and it also improves user experience as clicking on the label also focuses on the input field.
Example:
<label for="firstname">First Name</label>
<input type="text" name="firstname" id="firstname">
Browser Output :

The
forattribute is used to associate a label with the form element.The value for the
forattribute is set as theidof the form element which isfirstnamein the above example.
HTML <button> tag :
The HTML <button> element is an interactive element that is activated by a user with a mouse, keyboard, finger, voice command, or other assistive technology. It performs a programmable action, such as submitting a form or opening a dialog when clicked. For example,
<button type="button">Click me</button>
Browser Output

The type attribute determines the action performed by clicking the button.
It has 3 possible values:
submit
reset
button
- submit
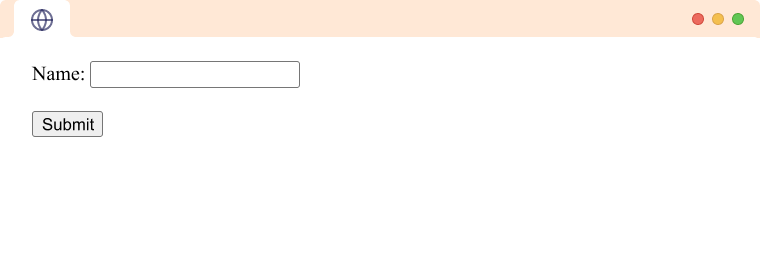
If the value of type is submit, the button click action submits the form. For example,
<form>
    <label for="name">Name:</label>
    <input type="text" name="name"><br><br>
    <button type="submit">Submit</button>
</form>
Browser Output :
- reset
If the value of type is reset, the button click action resets the value of all form elements to their initial value. For example,
<form>
    <label for="name">Name:</label>
    <input type="text" name="name"><br><br>
    <button type="reset">Reset</button>
</form>
Browser Output (before reset) :

Browser Output (after reset) :

- button
If the value of type is button, the button click action does not have a default function. Generally, javascript is used to add functionality to such buttons. For example,
<button type="button">Click me</button>
Browser Output

HTML <select>, <option> and <optgroup> tags :
The HTML <select> tag is used to create a menu of options. Each of the options is represented by the <option> tag. For example,
<label for="pets">Pets:</label>
<select id="pets">
    <option value="dog">Dog</option>
    <option value="cat">Cat</option>
</select>
Browser Output :

Browser Output :

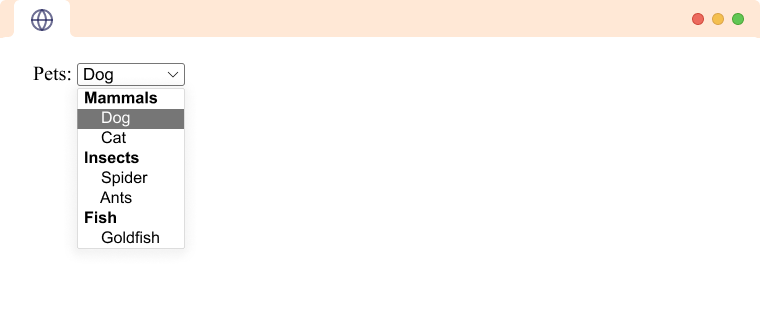
Additionally, we can also group option elements inside the <optgroup> tag to create a group of options. For example,
<label for="pets">Pets:</label>
<select id="pets">
    <optgroup label="Mammals">
        <option value="dog">Dog</option>
        <option value="cat">Cat</option>
    </optgroup>
    <optgroup label="Insects">
        <option value="spider">Spider</option>
        <option value="ants">Ants</option>
    </optgroup>
    <optgroup label="Fish">
        <option value="goldfish">Goldfish</option>
    </optgroup>
</select>
Browser Output :
HTML <textarea> tag :
The HTML <textarea> tag is used to define a customizable multiline text input field. For example,
<textarea rows="10" cols="30"> Type something…</textarea>
Browser Output :
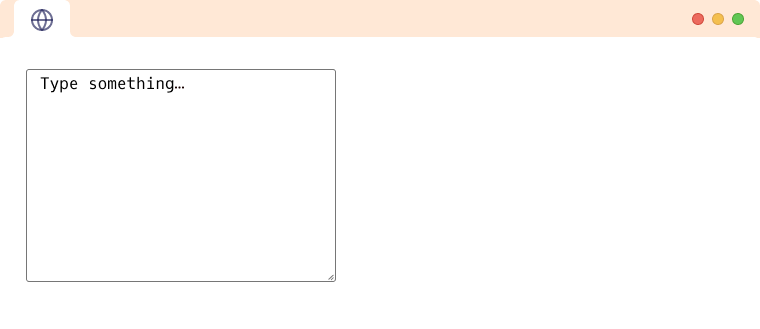
Here, the rows and cols attributes represent the rows and columns of the text field.
HTML <fieldset> tag :
The HTML <fieldset> tag is used to group similar form elements. It is a presentational tag and does not affect the data in the form. For example,
<form >
    <fieldset>
        <label for="firstname">First name:</label><br>
        <input type="text" id="firstname" name="fname"><br>
        <label for="lastname">Last name:</label><br>
        <input type="text" id="lastname" name="lname"><br>
    </fieldset>
</form>
Browser Output :
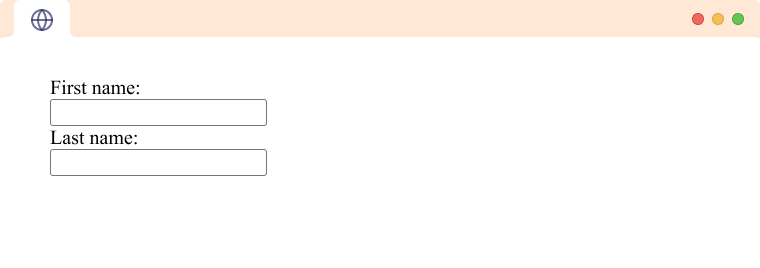
Here, the border is from the <fieldset> element.
HTML <datalist> tag :
The <datalist> tag defines a list of pre-defined options for an <input> element. It is used to provide autocomplete options to the form elements that show up as recommended options when the user fills in the form. For example,
<label for="country-choice">Choose a country:</label>
<input list="country-options" id="country-choice" name="country-choice">
<datalist id="country-options">
    <option value="Australia">
    <option value="Austria">
    <option value="America">
    <option value="Nepal">
</datalist>
Browser Output

Here, when the user types au, the browser suggests options with the letters to the user as a recommendation.
Conclusion :
InThis Blog We Studied HTML Table And HTML Form And Important Form Element.
What's next?
In Next Blog We Start The Next Section Of Our Web Development Challege That is CSS.
