CSS Position And Align ,Opacity And Important Properties :
Day 12 : 60 Days Of Full Stack Web Development Challenge
CSS Position :
The CSS position property is used to set position for an element.
it is also used to place an element behind another and also useful for scripted animation effect.
You can position an element using the top, bottom, left and right properties.
These properties can be used only after position property is set first.
A position element's computed position property is relative, absolute, fixed or sticky.
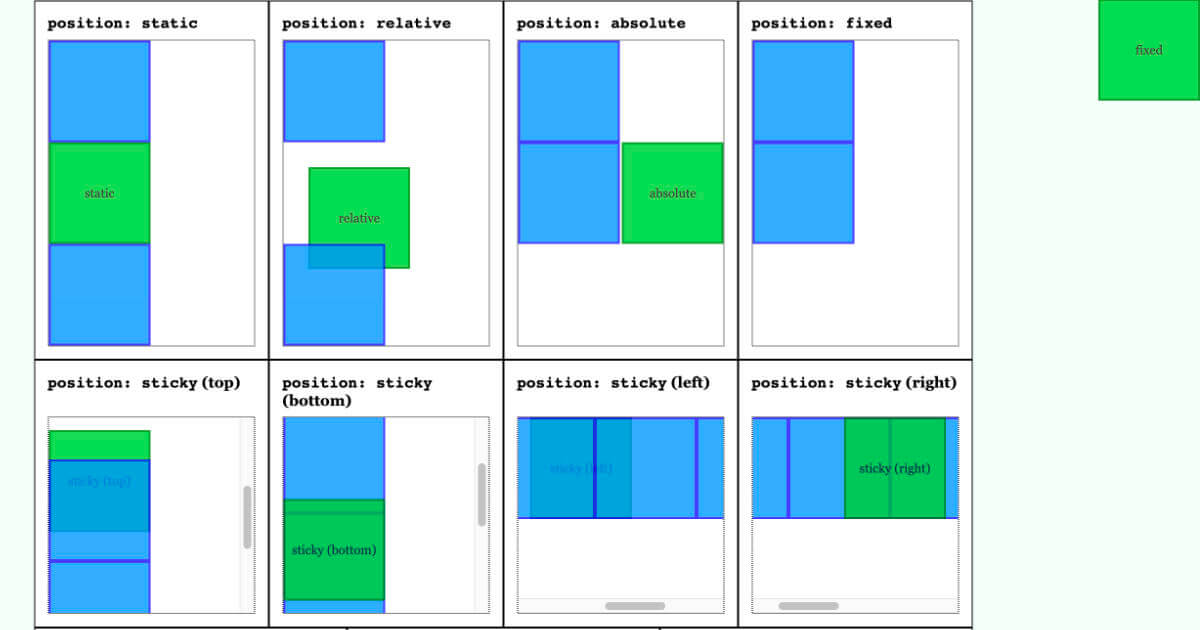
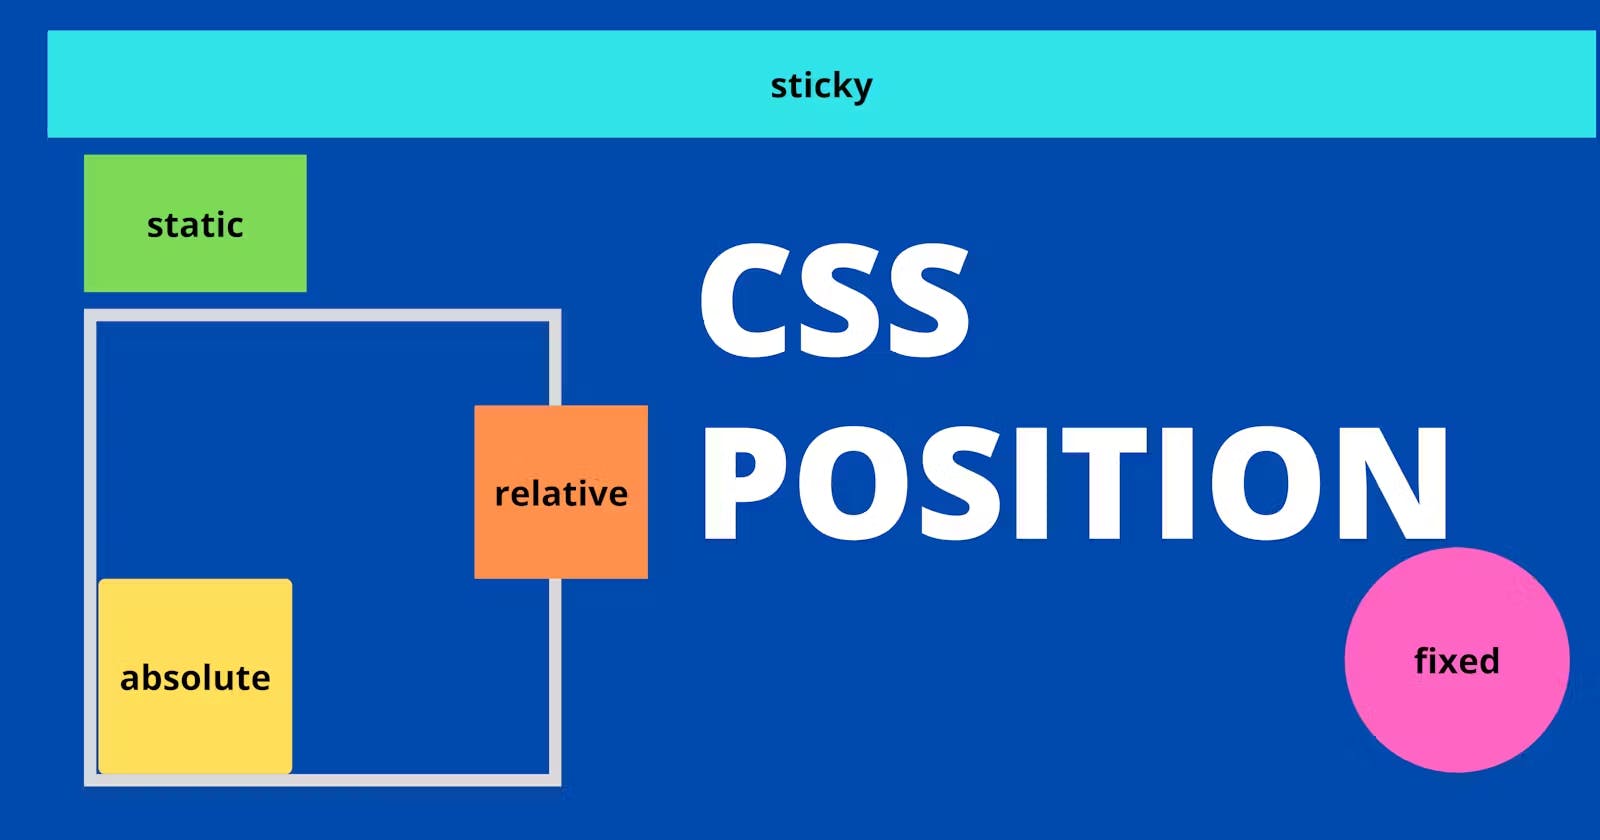
Let's have a look at following CSS positioning:
CSS Static Positioning
CSS Fixed Positioning
CSS Relative Positioning
CSS Absolute Positioning

1) CSS Static Positioning :
If no position value is mentioned in style for an element, static is the default value set for that element.
position : staticmeans that the element should be placed at the position according to the DOM flow.top, bottom, right, left are offset properties used to defined position of an element.
These offset properties won't work unless CSS position property is mentioned in the style of an element.
Syntax
selector {
    position: static;
}
Example
Let's create three divs with the colors red, blue, and green.
HTML :
<html>
    <head>
        <title>CSS Positions</title>
    </head>
    <body>
        <div class="red"></div>
        <div class="blue"></div>
        <div class="green"></div
    </body>
</html>
CSS :
We set the position property to static and the left property to 100px for the blue div.
:root {
    --red: #E74C36;
    --blue: #2980B9;
    --green: #27AE60;
}

div {
    width: 100px;
    height: 100px;
}

.red {
    background-color: var(--red);
}

.blue {
    background-color: var(--blue);
    position: static;
    left: 100px;
}

.green {
    background-color: var(--green);
}
Output
Eventhough the left property is set to 100px for the blue div, it doesn't alter its position in the viewport.

2) CSS Fixed Positioning :
An element with
position: fixed;is positioned relative to the viewport, which means it always stays in the same place even if the page is scrolled.The top, right, bottom, and left properties are used to position the element.
A fixed element does not leave a gap in the page where it would normally have been located.
Example
In this example, we set position: fixed and top: 200px for the blue div.
CSS
.blue {
    background-color: var(--blue);
    position: fixed;
    top: 200px;
}
Output
We can see that the blue div is positioned 200px from the top and the green div takes the place of the blue div. So the order changed from red => blue => green to red => green => blue.

3) CSS Relative Positioning
An element with
position: relative;is positioned relative to its normal position.Setting the top, right, bottom, and left properties of a relatively-positioned element will cause it to be adjusted away from its normal position.
Other content will not be adjusted to fit into any gap left by the element.
With relative positioning, the elements are positioned along with the natural flow of the document. But unlike static elements, the position of the relative elements can be modified using left, right, top, bottom, and z-index properties.
Syntax
selector {
    position: relative;
}
Example
Now for the same HTML content we saw above, we are setting the position property to relative and the left property to 100px for the blue div
CSS
.blue {
    background-color: var(--blue);
    position: relative;
    left: 100px;
}
Output
We can see that the blue div is moved 200px from the left. Even though it is moved from the left, there is a space between the red and the green div. This is because the relative positioning doesn't remove the element from its default position. Instead, the element is moved to the given position and its default place left unoccupied.

4)CSS Absolute Positioning
An element with
position: absolute;is positioned relative to the nearest positioned ancestor (instead of positioned relative to the viewport, like fixed).However; if an absolute positioned element has no positioned ancestors, it uses the document body, and moves along with page scrolling.
Note: Absolute positioned elements are removed from the normal flow, and can overlap elements.
The elements are positioned relative to their parent elements with absolute positioning. The absolute elements are positioned relative to the closest ancestor with any position property other than static. If the closest ancestor has a static position, the element is positioned relative to the next parent element without the static position property.
Example
Let's set position: relative to the blue div and give the value of left to 100px.
CSS
.blue {
    background-color: var(--blue);
    position: absolute;
    left: 100px;
}
Output
We can see that the blue div is moved 200px from the left. But unlike relative elements, the absolute element is removed from its default position and moved to the new position. Hence its old position is occupied by the next element. In this case, it is the green div.

Browser Support :
| Browser | Support (Version) |
| Chrome | 1.0 |
| Firefox | 1.0 |
| Internet Explorer | 7.0 |
| Safari | 1.0 |
| Opera | 4.0 |
CSS Vertical Align
The CSS vertical align property is used to define the vertical alignment of an inline or table-cell box. It is the one of the self-explanatory property of CSS. It is not very easy property for beginners.
What it does :
It is applied to inline or inline-block elements.
It affects the alignment of the element, not its content. (except table cells)
When it applied to the table cells, it affect the cell contents, not the cell itself.
CSS Vertical Align Values :
| value | description |
| baseline | It aligns the baseline of element with the baseline of parent element. This is a default value. |
| length | It is used to increase or decrease length of the element by the specified length. negative values are also allowed. |
| % | It is used to increase or decrease the element in a percent of the "line-height" property. negative values are allowed. |
| sub | It aligns the element as if it was subscript. |
| super | It aligns the element as if it was superscript. |
| top | It aligns the top of the element with the top of the tallest element on the line. |
| bottom | It aligns the bottom of the element with the lowest element on the line. |
| text-top | the top of the element is aligned with the top of the parent element's font. |
| middle | the element is placed in the middle of the parent element. |
| text-bottom | the bottom of the element is aligned with the bottom of the parent element's font. |
| initial | It sets this property to Its default value. |
| inherit | inherits this property from Its parent element. |
Example:
<!DOCTYPE html>
<html>
<head>
<style>
img.top {
    vertical-align: text-top;
}
img.bottom {
    vertical-align: text-bottom;
}
</style>
</head>
<body>
<p><img src="good-morning.jpg" alt="Good Morning Friends"/> This is an image with a default alignment.</p>
<p><img src="good-morning.jpg" class="top" alt="Good Morning Friends"/> This is an image with a text-top alignment.</p>
<p><img src="good-morning.jpg" class="bottom" alt="Good Morning Friends"/> This is an image with a text-bottom alignment.</p>
</body>
</html>
Output:

CSS hover :
The :hover selector is for selecting the elements when we move the mouse on them.
It is not only limited to the links.
We can use it on almost every HTML element.
To style the link to unvisited pages, we can use the :link selector.
To style the link for visited pages, we can use the :visited selector and to style the active links we can use the :active selector.
It is introduced in CSS1. The hover can be used to highlight the web pages as per the preference of users in an effective web-designing program.
The hover feature includes the following effects:
Change the color of the background and font.
Modify the opacity of the image.
Text embedding.
Create image rollover effects.
Swapping of images.
Example:
<html>
<head>

   <style>
      body{
         text-align:center;
      }
      a
      {
          color: red;
      }
      a:hover
      {
         color: green;
      }
      a:active
      {
      color: cyan;
      }
   </style>
 </head>
 <body>
    <h1>Move your mouse on the below link to see the hover effect.</h1>
    <a class = "link" href = https://www.javatpoint.com/css-grid>CSS Grid</a>
 </body>
</html>
Output :

After Hover:

CSS Important
This property in CSS is used to give more importance compare to normal property.
The !important means 'this is important'.
This rule provides a way of making the Cascade in CSS.
If we apply this property to the text, then the priority of that text is higher than other priorities.
It is to be recommended not to use this CSS property into your program until it is highly required.
It is because the more use of this property will cause a lot of unexpected behavior.
If a rule is defined with this attribute, it will reject the normal concern in which the later used rule overrides the previous ones.
If we use more than one declaration marked !important, then the normal cascade takes it over again.
That means the new marked !important will replace the previous one.
It increases the priority of the CSS property and ignores the overriding properties.
Syntax:
element {
    font-size: 14px !important;
    color: blue  !important;
    ...
}
CSS Opacity
The CSS opacity property is used to specify the transparency of an element.
In simple word, you can say that it specifies the clarity of the image.
In technical terms, Opacity is defined as degree in which light is allowed to travel through an object.
How to apply CSS opacity setting :
Opacity setting is applied uniformly across the entire object and the opacity value is defined in term of digital value less than 1. The lesser opacity value displays the greater opacity. Opacity is not inherited.
CSS Opacity Example: transparent image :
Let's see a simple CSS opacity example of image transparency.
<!DOCTYPE html>
<html>
<head>
<style>
img.trans {
    opacity: 0.4;
    filter: alpha(opacity=40); /* For IE8 and earlier */
}
</style>
</head>
<body>
<p>Normal Image</p>
<img src="/csspages/images/rose.jpg" alt="normal rose">
<p>Transparent Image</p>
<img class="trans" src="/csspages/images/rose.jpg" alt="transparent rose">
</body>
</html>
Output:

Conclusion:
his article explores Position ,Alighment,Opacity and their representation, as well as the pros and cons of each. We delve into commonly used methods for defining Position ,Alighment,Opacity Properties in CSS.Feel free to leave any comments or questions below. If you found this article informative, please share it with your network. Thank you.
What Next ?
CSS Flex Model
